Photography Tips:
*Always try to capture your landscape or flowers either in the late evening or early morning hours. The pictures will not turn out well in mid-day, they will have a glare and the colors will not show up as well. I love to take pictures after a rain shower on a cloudy day, they are the best.
*I never use a tripod because it is very difficult to get low enough to photograph flowers with one. I do try to steady my hands on something, be it a rock or birdbath or my knee or shoe while I'm sitting or kneeling on the ground. Any kind of movement will cause blurry pictures.
* Most cameras have a macro mode or a little flower which indicates a macro mode. This is what I use almost all of the time to get clear close up shots. Don't use the flash with macro. With my cameras you can't zoom in at all with macro, it goes out of focus.
*Get on the same level with the flowers, even if you have to sit in the dirt.
* Digitals are great because you can literally take hundreds of shots and choose the best ones, which is what I do many times. You can also check to see if you're getting good shots and adjust things accordingly.
*Keep the camera handy so you won't miss those unexpected photo opportunities. I'm so glad I had my camera in my pocket while I was gardening or I would have missed the great hot air balloon shot.
* I also always shoot in the auto mode, (this lets everyone know for real that I am but an amateur). Right now though, the camera is smarter than I am and usually gets the job done for me.
Photoshop Elements tips (you could do these same simple adjustments with any photo editing program):
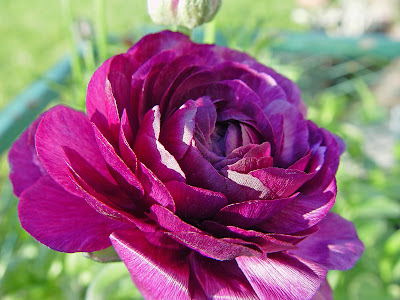
Here is the before shot of the Ranunculas; I did two separate adjustments to get the final picture.
 Here is the first "after" picture:
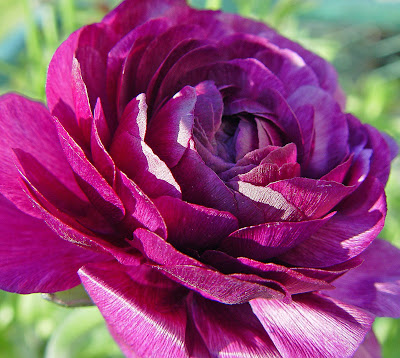
 I always use the easy quick fix feature. I always sharpen the focus a bit, then I lighten shadows, or if there is a glare I will darken it a bit and sometimes if I need to I will adjust the mid-tones. I will also sometimes use the color saturation feature if my colors are more dull than they should be. This feature doesn't change the color it just brightens it and helps the flowers to look the way they originally did in the garden. The over all one thing that makes the biggest difference is lightening the shadows. It makes a huge difference in all of my pictures.
 Here is the final product after cropping it to bring it in closer.
Here is another example using the same method. minus the cropping, with this picture of the lantana.


10 comments:
Thanks, Robin, for explaining the Photoshop process that you use to sharpen and brighten your photos. I've been hesitant to play with the colors or sharpness of my photos because I've worried that it might be perceived as a less "honest" recording. But you are quite right to point out that how the garden looks to one's eye can vary greatly from what the camera captures digitally, and one often loses subtle shadowing and color.
Moreover, photography is an art, and a photograph is not necessarily a "literal" representation of an object. Acknowledging that gives us room to tinker, doesn't it?
Robin, I ran with this topic on my blog. I used your post as a jumping-off point for a larger discussion about Photoshop. As I point out there, I have enormous respect for your photography. I hope you'll be interested in following the discussion too.
Pam, I'm glad you're doing that. I've been thinking about your comment and I'd certainly not want to do anything less than honest. It will be interesting to follow this and see what others think about the topic.
This is really interesting. Thank you for sharing your tips. I have such trouble taking closeup shots ... usually they are out of focus. Maybe it is the macro mode that I'm using with the zoom. I didn't know this.
I love the ranunculus and lantana pictures. They are really lovely shots!
An afterthought ... I think the use of photoshop is really no different from an artistic standpoint than an artist painting a flower and adding shadows and light sources and omitting imperfections... it seems to me that photography is much the same ...
Thanks for explaining how you work with photoshop to get better pics. It's true that sometimes the pics don't do justice to the real thing.
These are wonderful tips Robin, and thanks so much for taking the time to create this post. I use CorelDRAW products (PhotoPaint) but it is the same as Photoshop. You have inspired me to do some adjustments when I have the time. The results are fantastic and much more a "work of art" than before.
I use Photoshop Elements also along with Paint Shop Pro. Great tips.
Wow, terrific suggestions and I thank you. I agree totally that lightening shadows makes the biggest difference and I wish everyone used it! SO many photos on line are hard to see, or I should say the plants in them are hard to see. I've never played with the midtones, but now I will.
Thanks for the tips... I hadn't really thought of adjusting colours and light levels. I'm going to try it out.
Post a Comment