Showing posts with label Craft Projects. Show all posts

Monday, December 17, 2012

Easy Felted Arm & Wrist Warmers

Here is a fun winter project that pretty much anybody can do! Chance are you already have everything you need to do this already in your home! All you need is a sweater that is at least 80% wool!

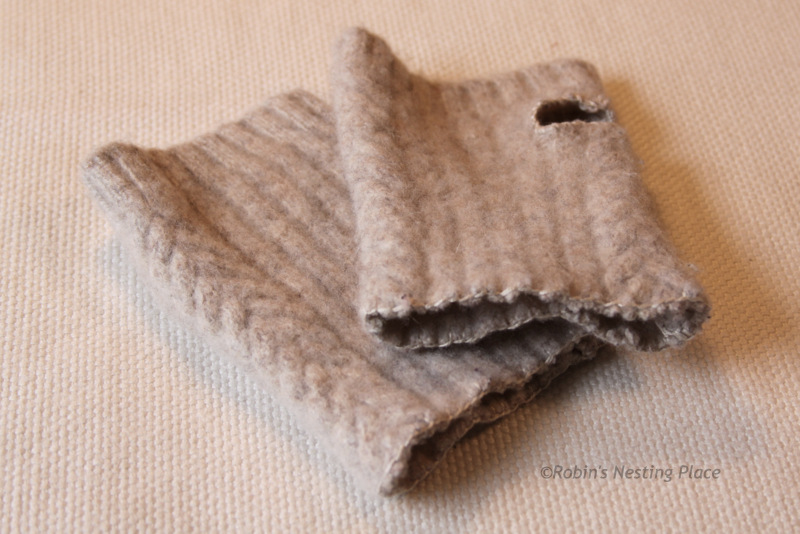
 I wanted to make a felted wool quilt so I had been collecting sweaters at Goodwill for months. After cutting my quilt squares, I hated to waste so much of the wonderful felted wool. So I decided to make arm and wrist warmers from the sleeves! Here are a few that I've made!


(These have already been sold to a friend!)


There are so many ways to embellish and dress them up! They are practical and cute and really help keep your arms and hands warm and leave the fingers free for typing and texting!


My daughter was sweet to play hand model for me when she dropped by after work today!

These are the first pair of wrist warmers I made! I wear them to work and I love them!

I like making them so much that I decided to sell them at them vendor mall where I work!

There is something comforting and cozy about working with felted wool! To felt the wool, you wash the sweaters in very hot water with laundry detergent and dry on high heat. Some sweaters will have to be washed twice to felt properly. Beware, it is very messy! After washing the sweaters you will have clumps of fibers in the washer and on the sweaters. I just look over the sweaters and pick off the clumps before drying them. I am saving the loose wool to put in the garden next spring for the nesting birds! Because the fibers come off of the sweaters, I only wash one sweater at a time or if they are very similar in color I will wash them together.

Felting the wool causes the fibers to become very tight so you can cut it without concern that it will unravel. I use a blanket stitch especially around the thumb hole mainly for reinforcement.


You still have time to make a pair as a gift for Christmas or for yourself for winter!

Thursday, November 8, 2012

Nature Shots Coasters

It is hard to believe that we are nearing the Christmas season! I work in retail and I've been seeing Christmas decorations for a few weeks already! I'm not ready for that quite yet! But ready or not, here it comes!

 If you are looking for inexpensive teacher gifts or hostess favors, I have a quick and easy project that you may like!

I enjoy nature photography and I have so many pictures of flowers and birds! I had seen the tile coaster tutorials on blogs and Pinterest and thought I'd make a few with some of my favorite bird pictures.

I bought the 4x4 tiles at Lowe's. You cover the tile with Mod Podge, place your picture on the tile and coat several times with Mod Podge, (drying in between coats)! I used peel and stick cork for the backs but you can also use felt.

I had these in a friend's vendor space last year and they sold pretty well through the holidays.

I've been collecting wool sweaters from Goodwill for a few fun winter projects. (Maybe if I say that out loud I'll actually get to them!)

We are supposed to have unseasonably warm weather this weekend in Indy. I have to work, but I hope to have some time outside to finish up a few things before winter sets in.

Enjoy your weekend!

Saturday, December 10, 2011

Pillow Talk

I have been seeing sweater pillows on different blogs and in catalogs and wanted to make one to cozy things up a bit this winter.

As you can see, the cats have to be right in the middle of my projects, literally! This sweater was purchased at Goodwill for .99¢. It wasn't exactly what I wanted, but for that price, I was happy.

The first order of business was to cut off part of the sleeves. I saw a darling pair of skates on Carolyn's blog, Aiken House and Gardens, that gave me the idea to cozy up my $3.00 garage sale skates. (If  you've never been to Carolyn's blog you should go and visit!)

I turned the sleeves inside out, stuffed them into the skates and rolled them over. It definitely dressed them up!

I have plans for the other skate, that I'll hopefully share later!

The sweater was pretty stretchy but I had a pillow the right size that was pretty worn out. I just cut the fabric and removed the stuffing and filled this one with the same amount.

I made flowers from different parts of the sweater, so not much of it went to waste. I even made the cats a toy mouse and filled it with stuffing and cat nip.

Not bad for a .99¢ Goodwill sweater! Sure beats the $39.00 Pottery Barn pillow!

Here is another pillow project. This was a square placemat that I saw at Kohl's
I used my seam ripper and opened up a section on the bottom. I used fiberfill that I got at a garage sale for .50¢ to stuff it.
After I made the pillow I was at Kohl's with my son while he shopped and saw that they already had pillows made from this fabric. Look at the price difference!
Here is the tag on the placemat.
Both the placemats and the pillows were 50% off. I also had a 30% off coupon and actually got it free since my son had given me his $10.00 Kohl's cash. He has a very generous heart, that sweet boy of mine!

We can't have pillow talk without a picture of a sleeping kitty!

The birds are already making use of the pretty winter feeding station. That is always a sweet treat!

Just for fun, here is a shot I took while I was at the outdoor mall with my daughter.

I hope you all have a lovely weekend!

Thursday, August 26, 2010

Bless this Nest


I have been busy the last several weeks painting and redecorating the master bedroom. Early this summer I found a new picture frame, still in the packaging, at a garage sale for a couple of dollars. I love photography and seldom pass up reasonably priced frames at garage sales. This particular frame was one that held six 4x6 pictures. I have a plant shelf down the entire length of a long wall in the master bedroom that is very difficult to decorate.

Several months earlier I had a gift card to Kohl's and bought the "Bless this Nest" vinyl wall art. With the name Robin, I am fond of all things bird related and have bird cages, nests, and bird pictures and decor all over my home. I had not used the vinyl because I wasn't sure where to put it. As I was contemplating what to put on the plant ledge, I remembered both the vinyl and the frame. A perfect decorating solution for my tight budget!

I'm not sure that this even needs an explanation, but just in case anyone else is interested in this project, here is how I did it. I opened the frame and removed the mat for the six 4x6 prints, and attached the burlap to the piece of cardboard that came with the frame, stretching it and securing it with tape on the back. Then I put the frame back together and placed the vinyl wall art directly on the glass. That's it!

This was a very quick and easy project and only cost me a couple of dollars!

Linking to: